I love making handmade accessories that show off my style. When I found crochet bag patterns, I knew I had to try them. I was excited to make a unique tote bag for everyday use.
In this guide, we’ll make a stylish crochet tote bag together. It’s perfect for beginners and experts alike. You’ll get easy instructions, tips, and the chance to make it your own. Soon, you’ll have a beautiful bag to carry with pride.
Table of Contents
Key Takeaways
- Discover the joy of creating your custom crochet bag
- Learn essential skills and techniques for beginner-friendly bag-making
- Explore a range of yarn options and color choices to personalize your tote
- Follow step-by-step instructions to construct the base, sides, and handles
- Enhance your bag with structural elements and decorative touches
Introduction to Crochet Bag Making
Crocheting bags is a great hobby. It lets you make stylish, eco-friendly accessories that you can customize to fit your style and needs.
Whether you want a sturdy tote or a chic crossbody, crochet bag-making offers lots. It’s a fun way to express yourself through your creations.
Benefits of Creating Your Crochet Bags
- Sustainable alternative to disposable plastic bags
- Ability to personalize the design, color, and size
- Develop essential crochet skills like stitch patterns and bag construction
- Save money by making your accessories
- Enjoy the satisfaction of creating something unique and handmade
Essential Skills for Bag Making
To make your own crochet bags, you need to learn a few skills. First, you must know basic crochet stitches. These include single crochet, half double crochet, and double crochet.
You also need to be good at reading crochet patterns. This means following instructions for shaping, joining, and finishing your project.
What to Expect from This Guide
In this guide, you’ll learn how to pick the right yarn and hooks for your bag. We’ll cover the tools and materials you’ll need, as well as common terms used in crochet bag patterns.
You’ll get step-by-step instructions for making the base, sides, and handles of your tote. We’ll also talk about adding structure and support. Plus, you’ll learn how to customize your bag to make it truly unique.

By the end of this guide, you’ll be ready to start your crochet bag project. It could be a simple market tote or a more complex crossbody design. So, let’s get started and enjoy making our handmade accessories!
Choosing the Right Yarn for Your Tote
Choosing the right yarn is key for a perfect tote bag. The yarn’s look and durability are crucial. We’ll look at the best yarn types, weights, and tips for a lasting bag.
Recommended Yarn Types and Weights
For sturdy tote bags, use #3 Light / DK weight yarn and above. Lighter yarns are better for foldable bags, as they’re more flexible. Stay away from synthetic yarns like acrylic and nylon, as they shed and stretch.
Natural fibers like hemp, jute, and chunky cotton are best for durability. Hemp yarns from byGoldenberry, Darn Good Yarn, Lana Knits, and Lion Brand are great choices, priced from $16.00 to $76.90. Jute yarns, like Hooked Jute from LoveCrafts, start at $10.99. For a classic look, try heavier cotton yarns from GANXXET, LoveCrafts, and Ice Yarns, starting at $3.50.
Color Selection Tips
Think about the look you want when picking yarn color. Smooth, tightly twisted yarns resist pilling better than fuzzy ones. Also, bulk-dyed yarns hold color better than hand-dyed ones.
Durability Considerations
Cotton and linen are good for crochet bags because they’re less stretchy. Most bags use medium-weight DK and worsted yarns for durability. Good options include Lily Sugar’n Cream Worsted, Patons 100% Cotton DK, and Premier Ribbon.

Different yarns are best for different needs. Felted wool is great for structure, while lightweight cotton is good for foldable bags. DK or worsted weight cotton, linens, or blends are best for durability. By picking the right yarn, your tote will look great and last long.
Essential Tools and Materials Needed
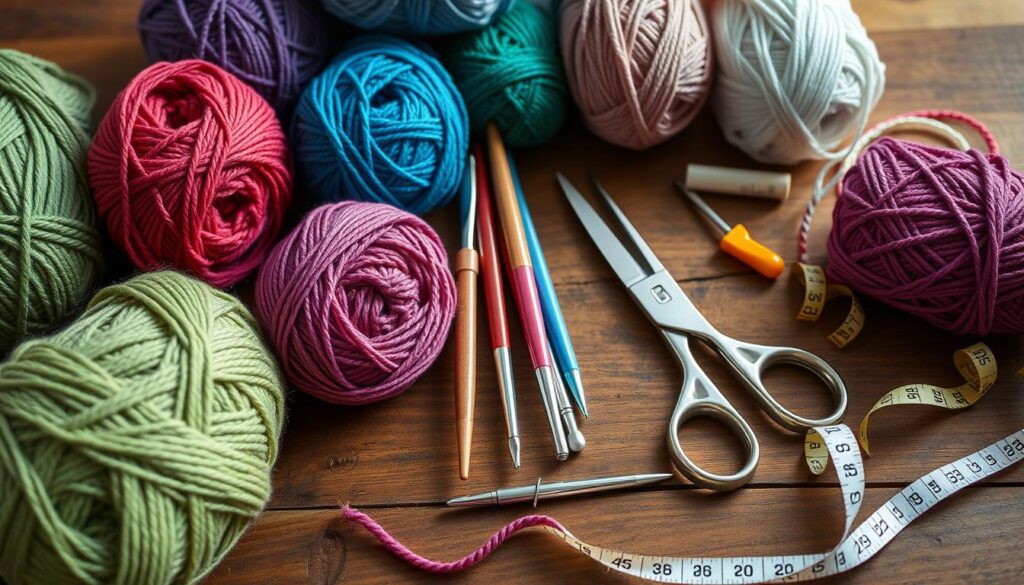
Starting your crochet bag project needs some basic tools and materials. First, you’ll need a good set of crochet hooks. An F5 (3.75 mm) hook is a great choice for most patterns. Using quality hooks, like WeCrochet Dots, helps with smooth stitching and keeps your hands comfortable.
You’ll also need a pair of foldable scissors. These are handy and safe, perfect for any crocheter. A tapestry needle is crucial for weaving in ends and adding decorations to your bag.
- Crochet hooks (F5 3.75 mm recommended)
- Foldable scissors
- Tapestry needle
- Retractable tape measure (60″ long with metric and imperial measurements)
- Acrylic ruler (4″ and 10cm on both sides)
- Gauge ruler
- Locking stitch markers
- A5 dot-grid notebook
- Roomy project bag
- Notions pouch
- Magnetic folder for chart reading
- Digital row counter
- Blocking tools and materials
You’ll need about 4 skeins of DK-weight yarn in two colors for your bag. This amount should be enough for a basic tote. Choose a yarn that’s durable and easy to wash.
With these crochet supplies and tools, you’re ready for many crochet projects. You can make simple totes or more complex bags.

Understanding Basic Crochet Bag Pattern Terminology
Learning the terms used in crochet bag patterns is key to success. Knowing common stitches and pattern instructions helps you follow the pattern easily.
Common Stitches Used in Bag Making
The main stitches for bags are single crochet (SC), double crochet (DC), and chain stitch (CH). You might also see SCBL (single crochet back loop) and SS (slip stitch).
Reading Pattern Instructions
It’s important to know terms like “magic circle” and “ch2sp” (chain-2 space). Also, pay attention to gauge to get the right size bag.
Learning basic crochet stitches and terms will help you make great crochet bags. With this knowledge, you can handle even complex patterns with confidence.
| Crochet Stitch | Abbreviation | Description |
|---|---|---|
| Single Crochet | SC | A basic stitch that creates a dense, sturdy fabric, often used for bag panels. |
| Double Crochet | DC | A taller stitch that creates a more open, airy texture, suitable for decorative elements. |
| Chain Stitch | CH | The foundation of many crochet projects, used to create the starting row or base of a bag. |
| Single Crochet Back Loop | SCBL | A variation of the single crochet stitch, working only in the back loop, creating a ribbed effect. |
| Slip Stitch | SS | A minimalist stitch used for joining rounds, attaching pieces, or creating seamless transitions. |
Mastering crochet pattern language is crucial for making beautiful bags. With practice, these terms will become familiar, making pattern reading easier.
Preparing for Your Crochet Bag Project
Before starting your crochet bag project, there are a few steps to take. First, create a gauge swatch to find the right size. This ensures your bag turns out as planned.
Then, organize your materials and pick a comfy spot to work. Make sure you have all the needed supplies like yarn, a crochet hook, scissors, and any extra parts. Having everything ready makes crocheting more fun and easy.
It’s key to get to know the crochet pattern and stitches for your bag. Read the instructions carefully and learn any new stitches. This confidence boost will help you tackle the project smoothly.
Lastly, think about making a small sample or practice piece. It’s great for beginners to practice new stitches before the big project. This way, you can get better at the skills before diving into the main project.
By preparing well, you’ll have a great time making your crochet tote. Enjoy the journey of creating something unique and stylish!
Step-by-Step Crochet Bag Pattern
Making your crochet tote bag is a fun project. It lets you show off your creativity and style. This guide will help you make a beautiful crochet bag pattern from start to finish.
Base Construction
To begin, you’ll make the base of your crochet tote pattern. You’ll crochet squares or rectangles and then sew them together. For this pattern, you’ll use 15 granny squares, each with 10 rounds.
Start with a magic circle and crochet in rounds. Switch colors as you go.
Building the Sides
After the base is done, you’ll make the sides of your crochet bag. Crochet more granny squares or rectangles. Then, sew them together with a mattress stitch.
This will give your tote its shape and structure.
Creating the Handles
The last step is making the handles for your bag. Chain the number of stitches you want, then crochet single crochet stitches along the chain. Attach the handles to the sides of your tote securely.
Follow these steps to make a beautiful and unique crochet bag pattern. You’ll be proud to use and show off your creation. Happy crocheting!
“The joy of crocheting your own bag is in the creative process and the satisfaction of wearing a one-of-a-kind piece.”
| Crochet Bag Pattern Details | Specifications |
|---|---|
| Finished Size | 10 inches wide and 10-3/4 inches tall |
| Yardage Required | Around 250 yards; less than a skein of Bernat Maker Home Dec yarn |
| Wave Rows | 10 wave rounds |
| Round 1 Stitches | 80 single crochets |
| Round 2 Waves | 5 waves |
| Pattern Price | $3.99 for an ad-free PDF |
Adding Structure and Support to Your Tote
When you start your crochet bag tutorial, making your tote sturdy and useful is key. You’ll want to use some special techniques to make your bag last longer and work better. These steps will help your crocheted bag be both durable and practical.
Try using a thicker yarn or doubling up on the yarn you picked. This makes your bag stronger and keeps its shape better. Also, lining the inside with a thin, stretchy fabric like quilting cotton adds extra strength.
For the handles, think about using leather or other strong materials. Leather not only looks good but also makes the bag strong and comfy to carry.
To make your bag even more stable, add more stitches to the bottom. This helps it hold heavier things without sagging or losing shape.
By using these methods, you can make your crochet bag tutorial better. You’ll turn a simple crocheted purse into a stylish, lasting tote. It will be a favorite in your collection of crochet projects.
| Recommended Reinforcement Techniques | Benefits |
|---|---|
| Using firmer or doubled yarn | Improved shape and structure |
| Lining the interior with lightweight fabric | Added durability and reinforcement |
| Incorporating leather or durable handles | Elegant, comfortable, and long-lasting |
| Reinforcing the base with extra stitches | Enhanced support for heavier items |
By following these tips, you can make a crochet bag tutorial that’s not just stylish but also lasts a long time. Your crochet purse design will be a valuable addition to your collection of crochet projects.
Creative Customization Options
Elevate your crochet purse design with creative options. Try vibrant colors and charming decorations. These make your handmade accessories stand out.
Color Pattern Ideas
Try bold color combos to make your crochet projects pop. Use stripes, color blocks, or ombre for interest. Mix contrasting or complementary colors for your look.
Decorative Elements
Add fun touches to your crochet bag. Use tassels, appliqués, or embroidery for a unique look. You can also add pockets or special closures like buttons or zippers.
| Yarn Type | Yarn Weight | Yardage Needed |
|---|---|---|
| Premier Cotton Fair | Worsted | 1 skein / 3.5 oz / 100 g / 290 m / 317 yards |
Customization options are endless for crochet bags. Let your creativity shine and make your crochet purse design reflect your style.
“Crochet is the perfect medium for personal expression. The possibilities for customization are endless!”
Tips for Perfect Bag Shaping
Making a crochet bag or tote is a fun project. But, getting the right shape and structure needs focus. Whether you’re using a crochet bag tutorial or making your crochet tote pattern, these tips will help you get it right for your next crochet project.
- Maintain Consistent Tension: Keep your crochet tension even. Uneven tension can cause the bag sides to be uneven and the shape to be off.
- Block Before Assembly: Block your finished crochet pieces before putting the bag together. This step is key to keeping the fabric’s shape and size.
- Align Squares Carefully: When joining squares or panels, make sure the edges line up perfectly. This gives a clean, professional look.
- Use Stitch Markers: Use stitch markers to mark rounds and pattern repeats. This helps keep your bag’s structure as you crochet.
- Consider Bag Usage: Think about how you’ll use the bag when choosing its size and shape. A tote for grocery shopping might need a different shape than a small purse.
By following these tips, you can improve your crochet bag-making skills. You’ll create a tote or purse that’s not only stylish but also keeps its shape and structure.
“Crochet is the art of using a hooked needle to interlock loops of yarn, thread, or strands of other materials to create a textile fabric.”
Handle and Strap Variations
When making a crochet bag or purse, the handle and strap are key. They must be both functional and stylish. Look into different handle styles and ways to make them strong and good-looking.
Different Handle Styles
Crochet bags can have many handle types. You can use crocheted straps, leather, or rope for a sea look. For long straps, chain the length you want and crochet single stitches for a strong grip.
Reinforcement Techniques
To make your crochet bag pattern last longer, reinforce the handles. You can do this by crocheting more rounds or using a thicker yarn. For example, the 15 Pound Test Super Clear fishing line from The Danielson Co. works well.
Tests showed that straps with fishing line didn’t stretch. For straps that can adjust, add D-rings or use adjustable straps. Always test the handle before using your crochet purse design to make sure it’s strong.
“Fishing line found effective in preventing crochet straps from stretching when worked lengthwise with long rows.”
| The fishing line worked lengthwise | Effectiveness in Preventing Stretch |
|---|---|
| Fishing line worked lengthwise | Highly effective |
| Fishing line worked row by row | Some stretch observed |
| Crochet straps without reinforcement | Significant stretch |
Finishing Touches and Assembly
As you near the end of your crochet bag project, it’s time to add the final touches and assemble your stylish tote. First, weave in all loose ends securely to ensure a clean, professional finish. Then, use a mattress stitch to neatly join any squares or panels you’ve crocheted together, creating a seamless look.
Consider adding a simple border around the top of the bag to give it a polished appearance. This can be as simple as a round of single crochet stitches or a decorative edging like a scalloped or picot pattern. For added structure and to prevent stretching, you may also want to line the interior of your crochet bag with a complementary fabric.
Lastly, attach any additional elements you desire, such as buttons, appliqués, or other decorative touches. This is your chance to truly make the crochet project your own and showcase your unique personal style.
With these finishing touches complete, your handmade crochet bag is ready to be admired and used as a stylish handmade accessory. Enjoy the satisfaction of creating a one-of-a-kind crochet bag tutorial that you can proudly carry with you.
Care Instructions for Your Crocheted Bag
To keep your handmade crochet bag looking great, follow the right care steps. The care method depends on the yarn type. If it’s cotton, you can machine wash it on a gentle cycle. Just wash it with similar colors and let it air dry to keep its shape.
If your bag is made from delicate or specialty yarns, hand washing is best. Soak it in cool water with a mild detergent or wool wash. Lay it flat to dry to protect the fibers and stitches.
It doesn’t matter what yarn you used, always store your bag stuffed with tissue paper. This keeps it shaped and prevents creases. With proper care, your crochet bag pattern will stay stylish and durable for many years. Enjoy your beautiful yarn crafts!

